
Post by ashgerbil on Feb 15, 2006 8:13:39 GMT -8
;D these are the instructions for the sand playground that peoples have requested, hope you find 'em useful 
Here is a simple way to make a playground or photo backdrop for your gerbils. This playground will offer them a bit of freedom, the loose sand will enable your gerbils to have a bath and your gerbil will feel safe as he will be able to disappear into a burrow if he senses danger (which makes recapturing a bit difficult, but oh well! ;D) You can make many different landscapes, but one of the most effective and easy, are sand dunes which is what I’ve written these instructions on.
You will need:
· A large sheet of cardboard
· 1 – 3 tissue boxes (depending on size, time e.t.c)
· Kitchen roll/loo roll tubes or plastic tubes
· About 3 old newspapers
· Masking tape
· 20+ sheets of plain white paper
· Water and a bottle of PVA glue OR warmed water and flour (instructions on how to make this glue are included at the bottom) (*)
. A wooden spoon, or even better, a potato masher to mix the glue (#)
· Some sand-coloured paints (optional)
· A medium/large bag of chinchilla dust/sand or bird sand
· A few pebbles
· A few free hours
· Gerbils! ;D
First set out your cardboard sheet on a few sheets of newspaper, this shall be your base. You should also draw out where you want your sand dunes to go and plan out where you want your tubes to lead to and from first before sticking together. Cut out the holes where you want your tubes to go and make the holes just a little larger than the tubes. You will also need to cut the tubes to the required length. Then stick the tubes to the tissue boxes using masking tape. You may also want to cut out little doors so that your gerbil is easier to recapture REMEMBER: don’t stick the tissue boxes to the cardboard base until you have stuck tubes and boxes together first. In one of the pictures I have used plastic fruit punnets instead of tissue boxes.

Now stick the structure to your cardboard base with more masking tape and make sure there are no gaps where your gerbil can escape. Stick it down really well, as gerbils can sometimes nudge their way out if you havn't stuck it down properly! ;D You can now grab your old newspapers and take a sheet. Roll the sheet into a ‘sausage shape’ and stick down with masking tape in the required position for e.g. on the line you drew earlier to mark the edge of the sand dunes. In the pictures below, I have already added a few newspaper rolls and an extra mini hill in the centre, which you can put in, depending on the size of your base, I have added more layers of newspaper rolls and I have also added a rim so that the loose sand does not fall out. This is optional but quite a good idea as sand has a tendency to get everywhere!


You can make the dunes to whatever size you want for e.g. in the photos above, the dune on the far right, is quite small, but the two other dunes on the left, are quite big.
Also having most of the compartments built at the sides of the base allows you to make windows, like the one in the picture below, to be able to follow your gerbils activity, and also allows you to make an emergency exit/ or a hatch allowing you to clean a minimum inside

(*)
You could even have a gerbil balcony, to make it look like a steppe in the dunes and to make it look more like where a wild gerbil would live. and example is in the pic below (*)

And perhaps a sunroof too? all it is, is a side panel of a fruit punnet that has been taped to a hole in the roof, so that you can see your gerbils inside the burrows here's a pic...

(*)
You can also use plaster to cover the playground allowing you to make have more control over the shaping, just remember it is quite heavy, It is advised to put it on after the papier mache process since the newspaper would of probably not held under the weight. (*)
Now it is time for the messy part ;D. You will need to make some paste using water and PVA glue. Fill up an old ice cream tub, with water (must also have lid) to about three quarters (this is for a large playground). Then add lots of PVA glue and stir until the mixture goes slightly thick and looks ‘milky’.
Then you can grab your sheets of white paper and rip them into strips.
Next I would recommend that you get an old shirt and if you don’t want to get your hands covered in paste, go and get a pair of old rubber gloves on. The outfit may not be flattering, but it is best. You must then dip a strip of paper into the mixture and completely soak and then stick it onto the model. Make sure no corners are sticking up and that it won’t fall off. It’s basically papier-mache. Keep adding more and more strips until it looks like the picture below…

This next part is optional, but I’d advise you do it if you are using bird sand. Wait until the papier-mache has dried before painting. Mix up paint colour, which is a similar colour to the sand that you have. Then paint all over the model and leave to dry before going onto the next step. The picture below is what your painted model should look like.

The next step is the part where you shall get sand everywhere! ;D All you do is use cover your model with a thin layer of the paste you made earlier. Make sure you still have a few layers of newspaper underneath your model to catch excess sand. Then you grab a handful of sand and sprinkle it over your model. Keep doing this until the playground is completely covered with sand.
Let your model dry overnight before adding the ‘finishing touches’. Now you can wash some rocks with mild washing up liquid and a bristle brush and scrub until the rocks are clean. You may also want to add some shredded toilet tissue into the burrows or even make backdrop to stick behind the dunes. The picture below is my finished article (with Suki kindly showing you how to use it ;D)…

Alternative ideas…
If you do not have a lot of time, then why not make a smaller model? The picture below is of a one-burrow dune, which can be put on a sofa or floor when the gerbils are out for a run.

Or you can make a two-burrow system…

Now it is time for the best part, the testing out! Place the model on a low table or sofa and release your gerbil into the playground. Remember; always supervise your gerbils when they are using the playground!! Your gerbils will love to roll over in the sand and have a bit of freedom! Why not take out your camera and take a few pictures as well? The playground also serves as a great backdrop for photos also!
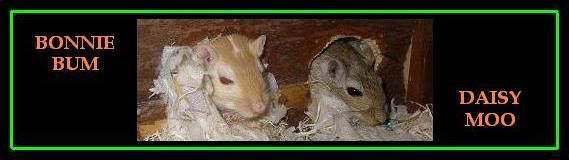
aannd here are a few pics of some adorable gerbies! hehehe ;D


I hope you enjoyed making it!! ;D
Glue 'recipe' lol
1 cup of plain flour, 3 cups of water : Slowly mix one cup of water into a cup of flour with a wooden spoon. Boil the other two cups of water and add slowly to the mixture stirring. Put the mixture in a pan and warm on the stove stirring until it thickens which takes 2 minutes (*)
(*) a big thank you to Theo (ImNotAGerbil) for these ideas
(#) Thanx to Michael for this idea

How To Make A Gerbil Playground
by ashgerbil
(And here’s one I made earlier!)

by ashgerbil
(And here’s one I made earlier!)
Here is a simple way to make a playground or photo backdrop for your gerbils. This playground will offer them a bit of freedom, the loose sand will enable your gerbils to have a bath and your gerbil will feel safe as he will be able to disappear into a burrow if he senses danger (which makes recapturing a bit difficult, but oh well!
 ;D) You can make many different landscapes, but one of the most effective and easy, are sand dunes which is what I’ve written these instructions on.
You will need:
· A large sheet of cardboard
· 1 – 3 tissue boxes (depending on size, time e.t.c)
· Kitchen roll/loo roll tubes or plastic tubes
· About 3 old newspapers
· Masking tape
· 20+ sheets of plain white paper
· Water and a bottle of PVA glue OR warmed water and flour (instructions on how to make this glue are included at the bottom) (*)
. A wooden spoon, or even better, a potato masher to mix the glue (#)
· Some sand-coloured paints (optional)
· A medium/large bag of chinchilla dust/sand or bird sand
· A few pebbles
· A few free hours
· Gerbils! ;D
First set out your cardboard sheet on a few sheets of newspaper, this shall be your base. You should also draw out where you want your sand dunes to go and plan out where you want your tubes to lead to and from first before sticking together. Cut out the holes where you want your tubes to go and make the holes just a little larger than the tubes. You will also need to cut the tubes to the required length. Then stick the tubes to the tissue boxes using masking tape. You may also want to cut out little doors so that your gerbil is easier to recapture REMEMBER: don’t stick the tissue boxes to the cardboard base until you have stuck tubes and boxes together first. In one of the pictures I have used plastic fruit punnets instead of tissue boxes.
Now stick the structure to your cardboard base with more masking tape and make sure there are no gaps where your gerbil can escape. Stick it down really well, as gerbils can sometimes nudge their way out if you havn't stuck it down properly!
 ;D You can now grab your old newspapers and take a sheet. Roll the sheet into a ‘sausage shape’ and stick down with masking tape in the required position for e.g. on the line you drew earlier to mark the edge of the sand dunes. In the pictures below, I have already added a few newspaper rolls and an extra mini hill in the centre, which you can put in, depending on the size of your base, I have added more layers of newspaper rolls and I have also added a rim so that the loose sand does not fall out. This is optional but quite a good idea as sand has a tendency to get everywhere!
 You can make the dunes to whatever size you want for e.g. in the photos above, the dune on the far right, is quite small, but the two other dunes on the left, are quite big.
Also having most of the compartments built at the sides of the base allows you to make windows, like the one in the picture below, to be able to follow your gerbils activity, and also allows you to make an emergency exit/ or a hatch allowing you to clean a minimum inside
(*)
You could even have a gerbil balcony, to make it look like a steppe in the dunes and to make it look more like where a wild gerbil would live. and example is in the pic below (*)
And perhaps a sunroof too? all it is, is a side panel of a fruit punnet that has been taped to a hole in the roof, so that you can see your gerbils inside the burrows
here's a pic...(*)
You can also use plaster to cover the playground allowing you to make have more control over the shaping, just remember it is quite heavy, It is advised to put it on after the papier mache process since the newspaper would of probably not held under the weight. (*)
Now it is time for the messy part ;D. You will need to make some paste using water and PVA glue. Fill up an old ice cream tub, with water (must also have lid) to about three quarters (this is for a large playground). Then add lots of PVA glue and stir until the mixture goes slightly thick and looks ‘milky’.
Then you can grab your sheets of white paper and rip them into strips.
Next I would recommend that you get an old shirt and if you don’t want to get your hands covered in paste, go and get a pair of old rubber gloves on. The outfit may not be flattering
, but it is best. You must then dip a strip of paper into the mixture and completely soak and then stick it onto the model. Make sure no corners are sticking up and that it won’t fall off. It’s basically papier-mache. Keep adding more and more strips until it looks like the picture below…This next part is optional, but I’d advise you do it if you are using bird sand. Wait until the papier-mache has dried before painting. Mix up paint colour, which is a similar colour to the sand that you have. Then paint all over the model and leave to dry before going onto the next step. The picture below is what your painted model should look like.
The next step is the part where you shall get sand everywhere! ;D All you do is use cover your model with a thin layer of the paste you made earlier. Make sure you still have a few layers of newspaper underneath your model to catch excess sand. Then you grab a handful of sand and sprinkle it over your model. Keep doing this until the playground is completely covered with sand.
Let your model dry overnight before adding the ‘finishing touches’. Now you can wash some rocks with mild washing up liquid and a bristle brush and scrub until the rocks are clean. You may also want to add some shredded toilet tissue into the burrows or even make backdrop to stick behind the dunes. The picture below is my finished article (with Suki kindly showing you how to use it ;D)…
Alternative ideas…
If you do not have a lot of time, then why not make a smaller model? The picture below is of a one-burrow dune, which can be put on a sofa or floor when the gerbils are out for a run.
Or you can make a two-burrow system…
Now it is time for the best part, the testing out! Place the model on a low table or sofa and release your gerbil into the playground. Remember; always supervise your gerbils when they are using the playground!! Your gerbils will love to roll over in the sand and have a bit of freedom! Why not take out your camera and take a few pictures as well? The playground also serves as a great backdrop for photos also!
aannd here are a few pics of some adorable gerbies! hehehe ;D
I hope you enjoyed making it!! ;D
Glue 'recipe' lol
1 cup of plain flour, 3 cups of water : Slowly mix one cup of water into a cup of flour with a wooden spoon. Boil the other two cups of water and add slowly to the mixture stirring. Put the mixture in a pan and warm on the stove stirring until it thickens which takes 2 minutes (*)
(*) a big thank you to Theo (ImNotAGerbil) for these ideas

(#) Thanx to Michael for this idea


 ;D that looks excellent dawn!! ;D
 it just comes up with little boxes with red crosses in the corner lol


