

Post by Ritzie/Admin on May 30, 2013 13:56:59 GMT -8


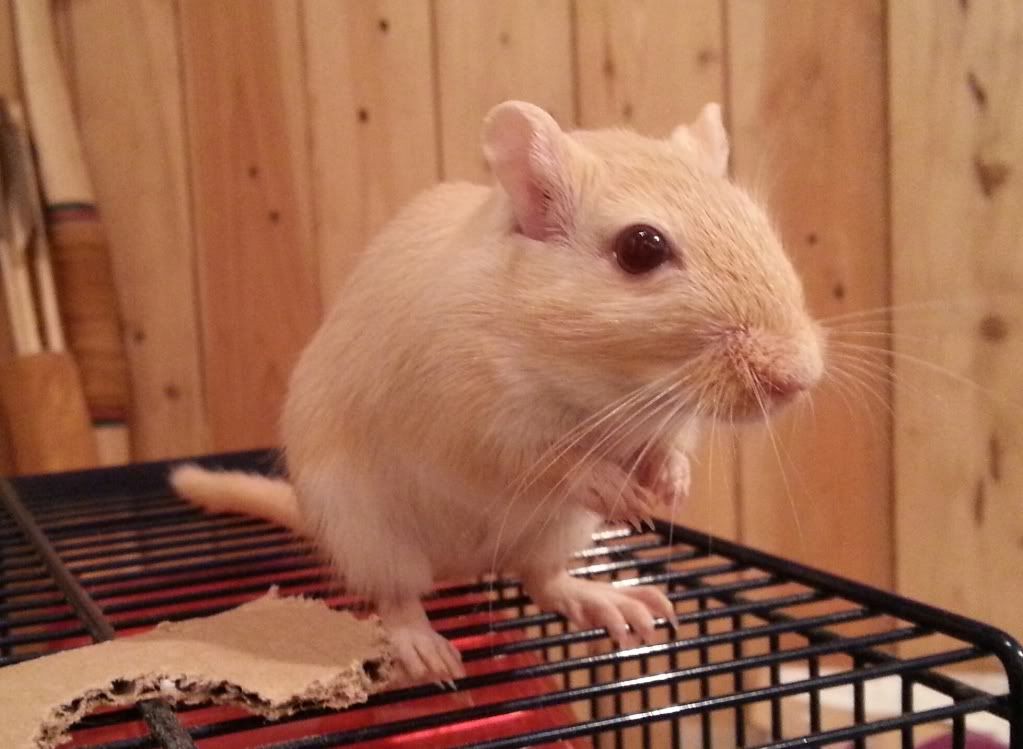
So, One of our Gerbils, Nipper, is slowly outgrowing her current living space. She has a long story, but basically put; Shes been living alone since her sister passed away not long after we got them home. We've tried to introduce her to new friends, but she hasn't taken to them or vice versa. So she is still living in the Pets at Home Gerbilarium (www.petsathome.com/shop/gerbilarium-by-pets-at-home-15962) we bought when we got them both about a year ago.
She likes her digging space & her topper, & we had some very specific requirements for a new tank. We couldn't find any second hand aquariums that fitted the bill, or any new ones either - so we decided to build one ourselves.
I've built a (semi)permanent split tank out of a wooden frame & perspex a few months ago, for a separate group of Gerbils. So the plan, idea, design, whatever you want to call it, is an evolution from there. As it has stood up to the test of time (& Gerbils!
 ).
). Now as with any good project, there must be planning before buying the materials & then building the thing. So I've spent a number of evenings, using some 3D design software to produce a 3D model of the Gerbilarium, including every part on the build list.
Below is the description I worked to. Including some screen grabs of the tank & topper, as well as a one of the complete setup. The separate 'halves' of the Gerbilarium have been rendered in the software to look realistic, but when I tried to do the whole unit, the software threw back horrible shadowing. I have also removed the nearest sides of Perspex & wire mesh, as with them in place it becomes impossible to see the internal detail. Also, please excuse the size of the images, it just helps to see them clearly when their larger.
Design specifics
- Must be large enough for two Gerbils, should Nipper ever take to a friend, or if the tank is used to house anybody else.
- Must fit on a 20"x20" table without overhang.
- Must have topper with good access into the internal space.
- Must be 'Gerbil-Proof', while still being aesthetically pleasing.
- Must be economical, as little wasted material as possible.
- Gerbils must be safe inside. They should not be able to harm themselves on anything inside the Gerbilarium.
Tank
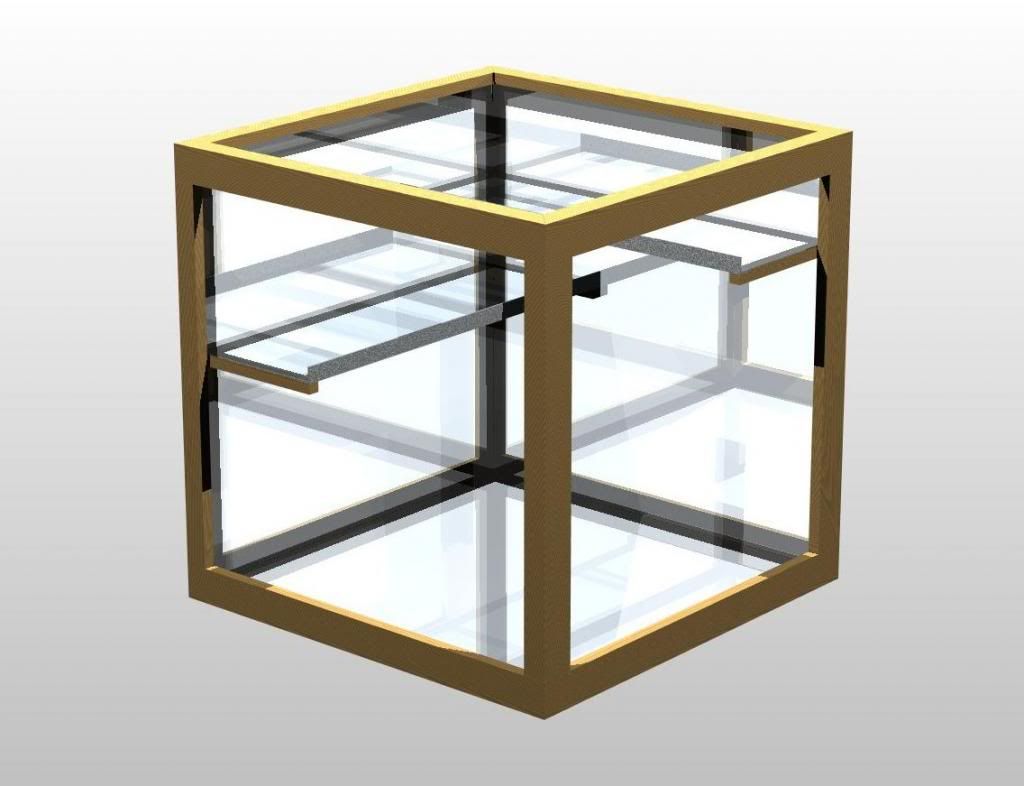
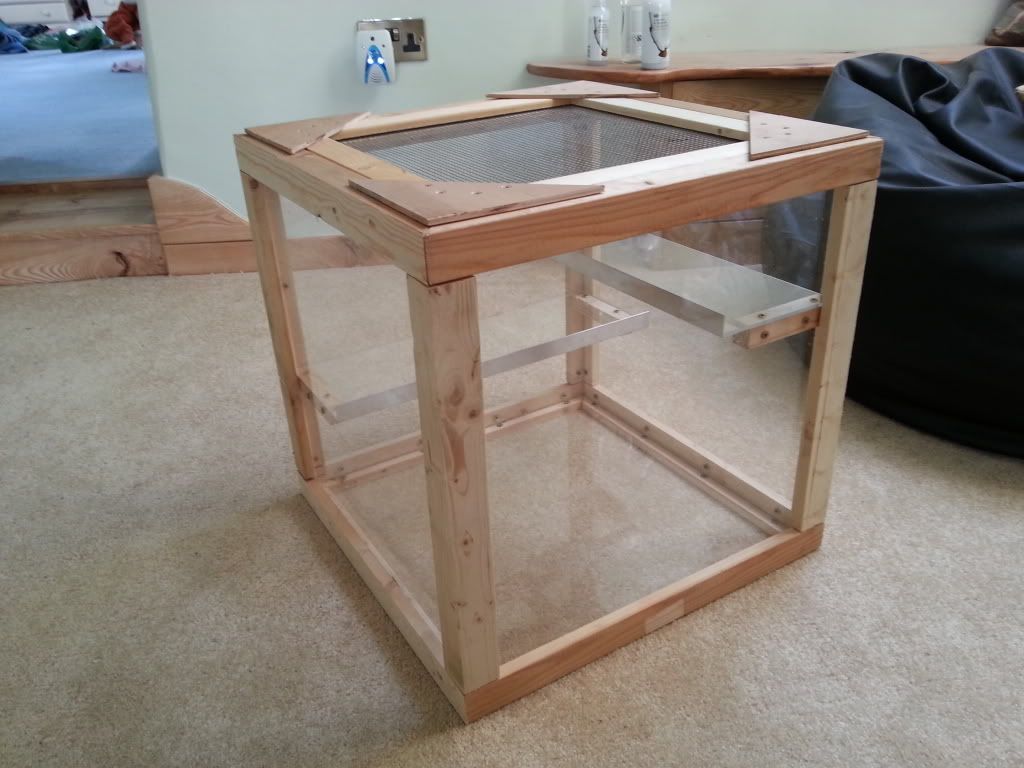
The tank is designed to have dimensions of 18"x18"x18". By my calculations thats around 21 Gallons (UK), so it both suits two Gerbils & fits on the table. Although the thickness of the external frame will be very tight on the 20"x20" restriction. The perspex covers all parts of the wooden frame & has no area accessible by little teeth. The frame is wood cut to shape & screwed into place on the outside of the perspex, the screws are countersunk to avoid causing harm to inhabitants. Internally the tank is very deep, so without using lots of bedding any Gerbils inside wont be able to reach the topper without the aid of a long, & possibly steep, ladder. Because of this, I have designed two shelves that fit inside, their final location is not yet certain, as they will be checked & completed in construction. These shelves also cut down on wasted Perspex. The selves are also attached in the same method of construction, screwed from the outside into a wooden frame that is out of nibbling reach. The shelves have a length of Aluminium Angle along the outside edge, to avoid slipping & falling accidentally, as well as keeping a layer of bedding to make it comfortable to walk around on & it also serves as a guard against chewing the shelf. These wooden frames are easily replaceable should they ever get chewed, or it is possible to place a length of Aluminium Angle along the most exposed areas. Each shelf measures 6" wide & runs the full width of the tank.
This is the rendered image of the tank section. You can clearly see the selves & their support framework, including the Aluminium Angle.
Topper
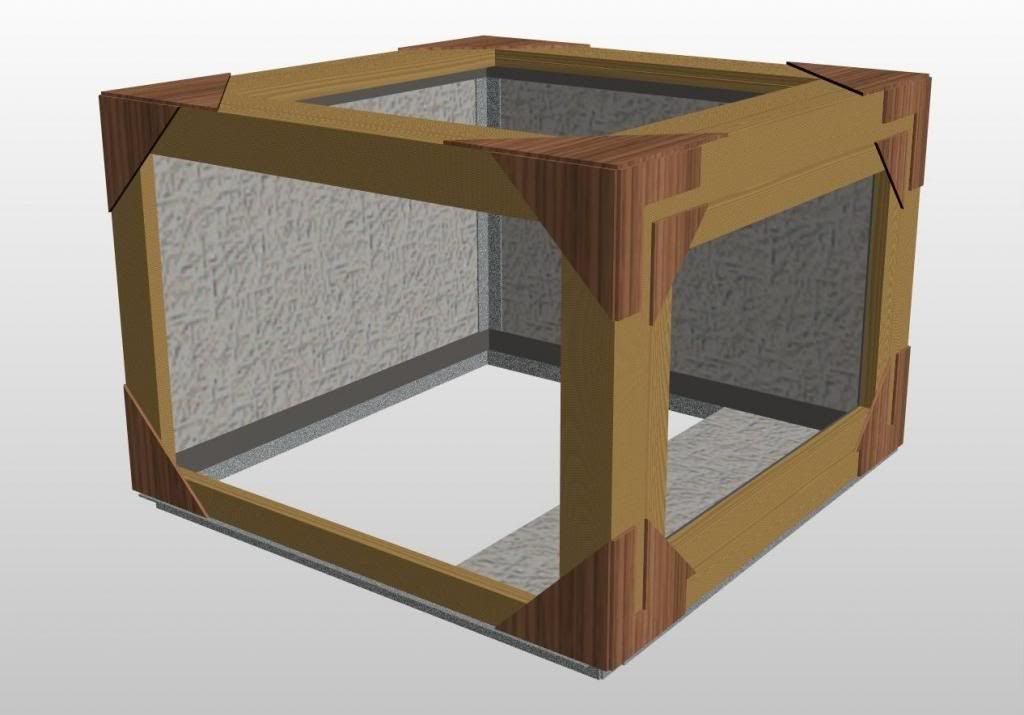
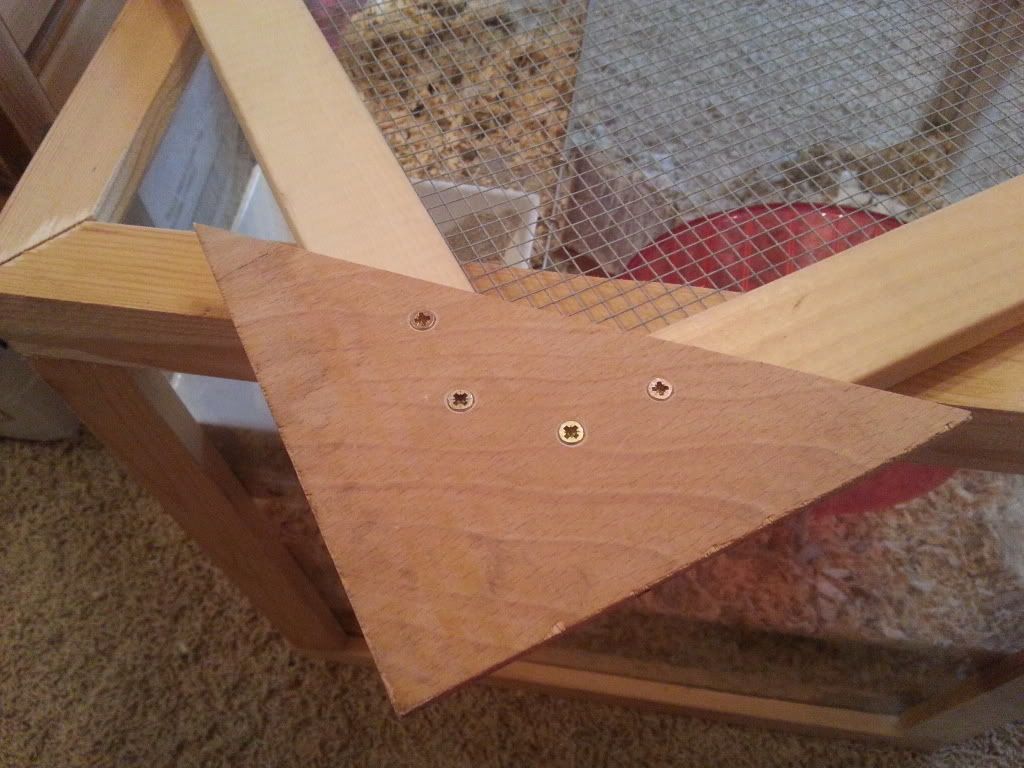
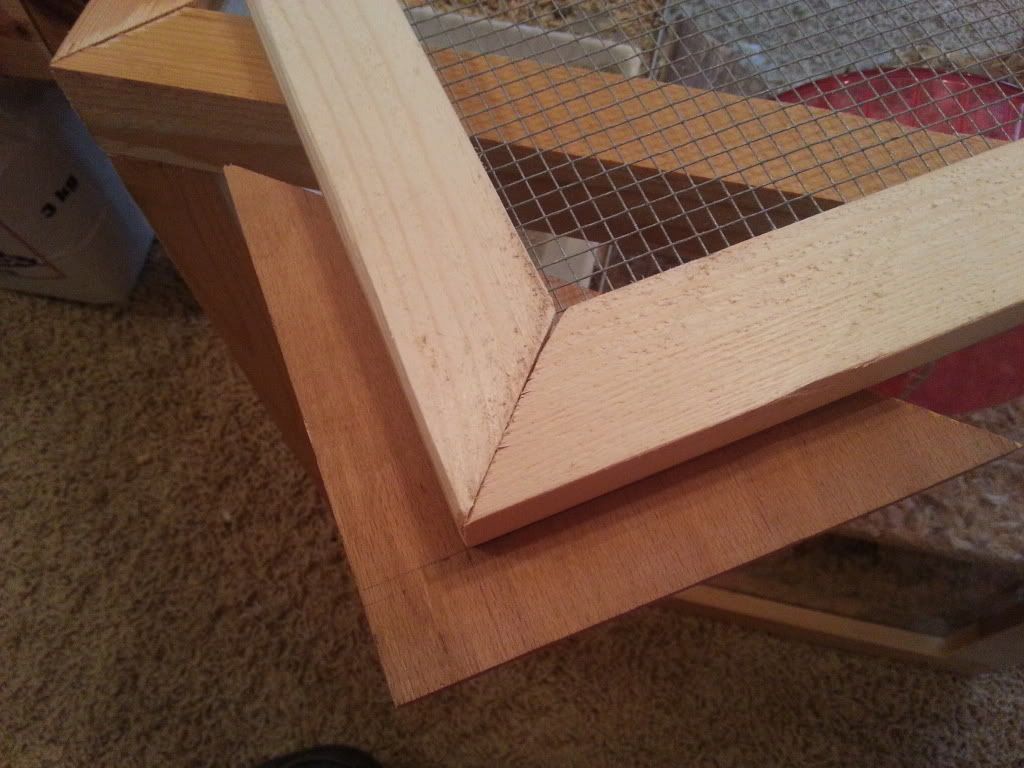
The topper follows a similar design as the tank however there are some changes - where the perspex is strong enough to support the frame, the wire mesh is not. So the topper has to be over engineered, to allow for it to support itself. The frame is wooden and held together with a number of corner plates, manufactured from plywood. The corner plates are screwed into place with four countersunk screws. Internally is where the topper gets interesting & tricky to build. The wire mesh is cut to fit three of the sides, it is then held in place by Aluminium Bar along the tops & bottoms, while the corners are secured by Aluminium Angle. The use of aluminium aids in securing the wire, protecting the wood from being chewed & stops any sharp or jagged points from the wire harming the Gerbils. The fourth side has a full size door that is hinged at the bottom. This is manufactured in the same way as the rest of the topper, it has plywood corner plates keeping it together & Aluminium bar protecting the internal edges. It will be latched at the top with a simple gravity lock (not included on 3D representation). The topper fits into the tank by a 'rail' of Aluminium Angle on the bottom edge, this will keep it from moving laterally while its own weight will stop it being lifted. (If the topper proves to be lighter than planned I might make a simple pin system to keep it locked down.) There is a shelf along the front edge made from wire mesh, which allows a comfortable platform to walk on, allows urine & poop to fall into the tank space (reducing the need to wipe clean as often) & uses wasted material. It is fixed in place by being sandwiched between the wood of the frame & the Aluminium Angle 'rail'. This shelf is also going to be capped to protect from causing harm, however this cap is not included on the 3D image as I'm unsure whether it will be Aluminium or sacrificial wood. The topper measures 17" 17"x11", which works out to have an internal volume of around 11 gallons (UK), The topper shelf is 7" wide. All wire mesh is a fine gauge of 5mm. The topper also has a removable lid. This is constructed with larger corner plates that over hang enough to sit comfortably inside the frame.
This is the rendered image of the topper. The wire mesh is represented by the textured grey. The Aluminium Angle is shown in a 'fuzzy' grey colour while the Aluminium Bar is a solid dark grey.
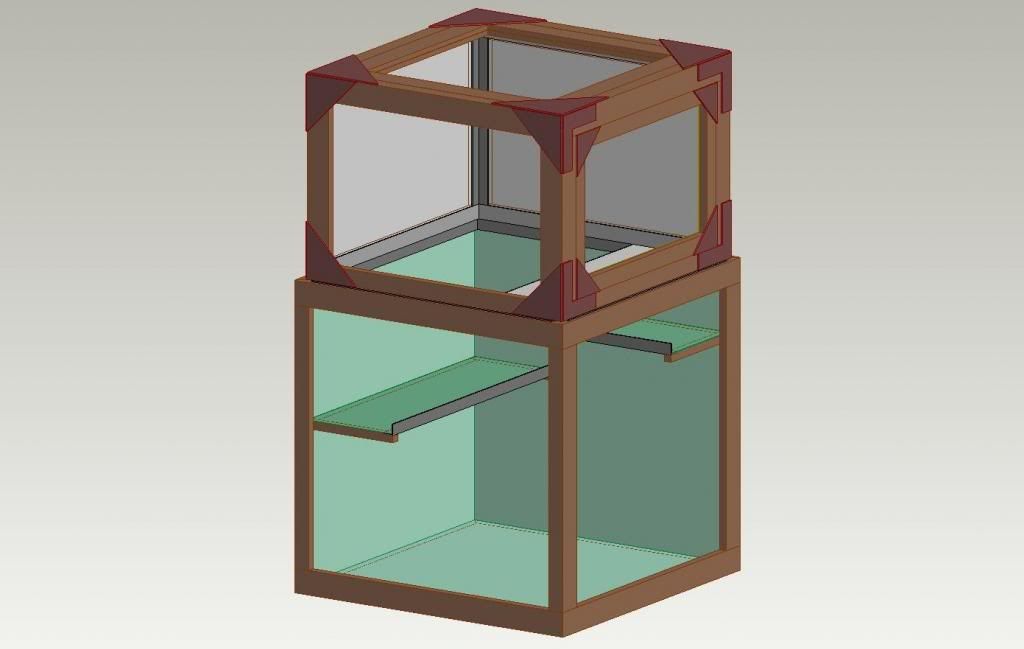
Here now is the full Gerbilarium;
You'll have to excuse the colours as I've had to get them 'as near as'.
- Wooden frame - Brown
- Plywood corner plates - Redish Brown
- Perspex - Green (It will be clear, but comes wrapped in a green protective film - It made sense to me
 )
) - Aluminium Angle - Dark Grey
- Aluminium Bar - Medium Grey
- Wire Mesh - Pale Grey/White
So far this is all the progress we have, however tomorrow we are going to purchase the required lengths of Aluminium & the wire mesh. Some of the aspects of the design may be changed during the build, as it may be more practical or may result in a better habitat & final product. We will photograph & document the build as it progresses, updating on here all the way of course.
I think I covered all the details of the build, but if anyone has any questions/suggestions, please do come forward! Neither Kate or I bite - Unlike Nipper
I have been really busy with work & I've not really been able to get into the workshop, so this project has had to go onto the back burner for a while.
However, I will post up the photos I have & do my best to describe them. (Large pictures, so brace yourselves!)
This one sheet of Perspex covers four sides, you can see a square sheet on the desk, that has been cut down to make the base panel.
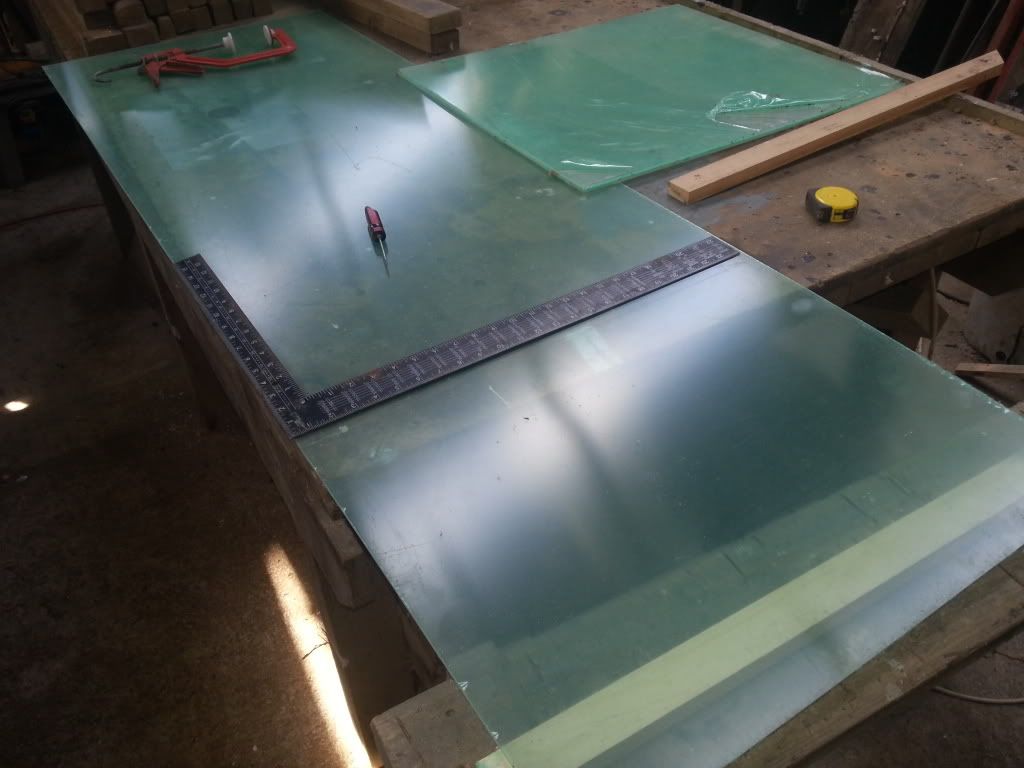
Four sides cut down, I did have the base cut at this point too - Just didn't include it in the photo!

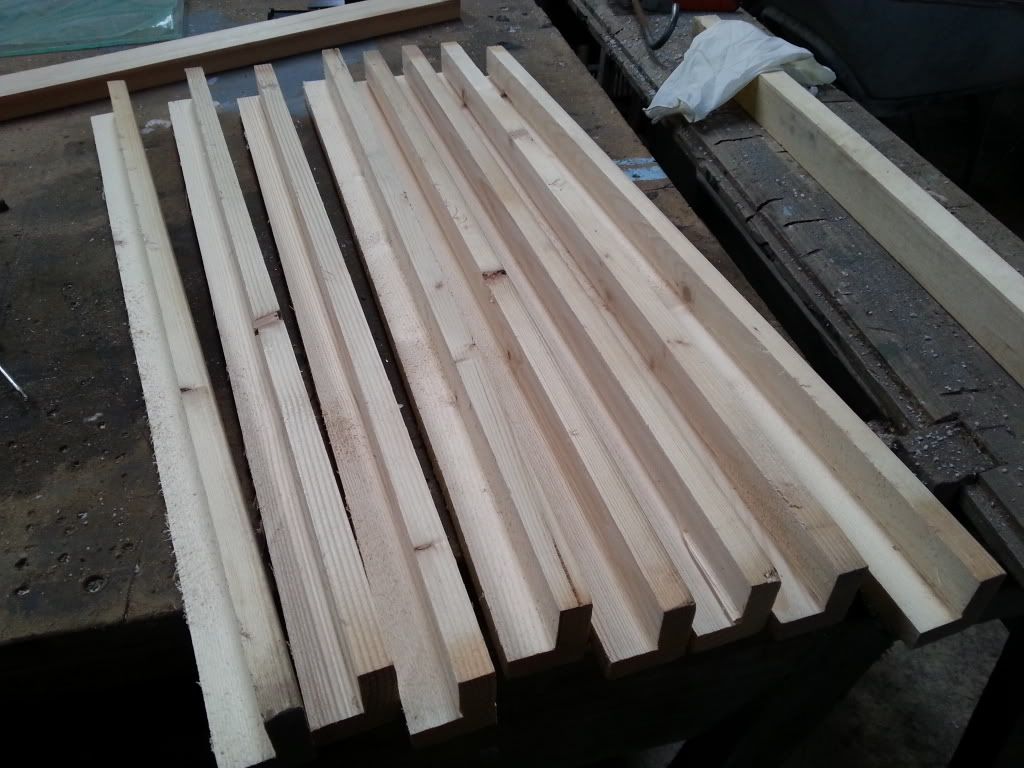
The lengths of wood for the frame are cut & shaped.
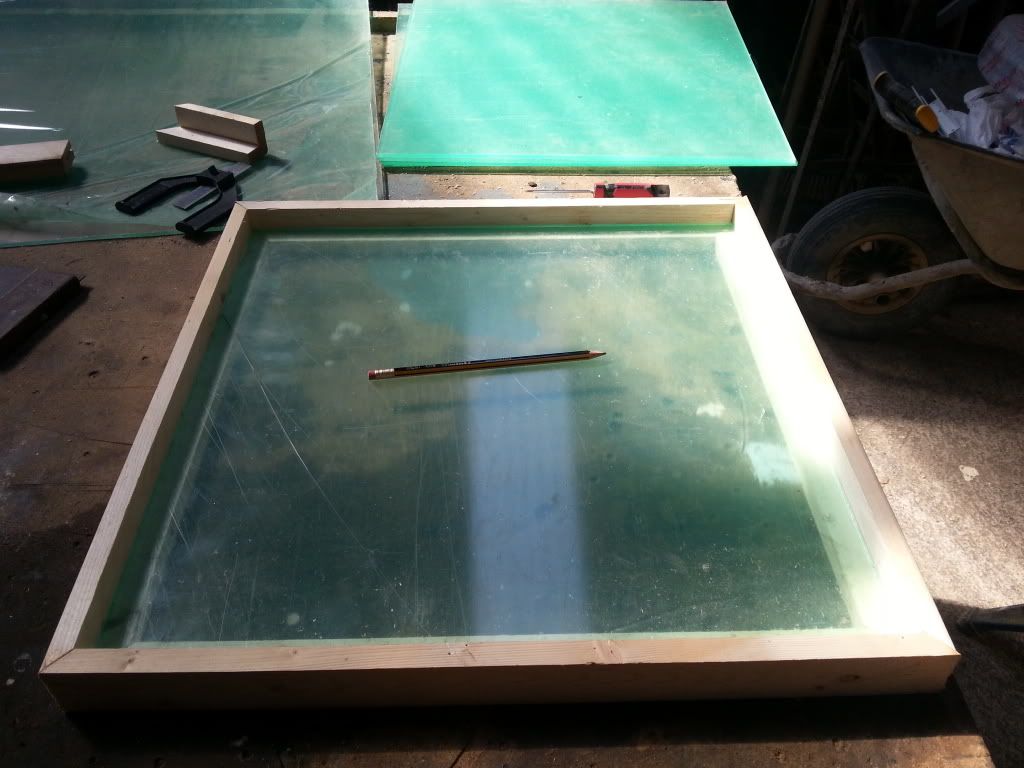
The base finally has a frame, from here I can then start to assemble the sides.
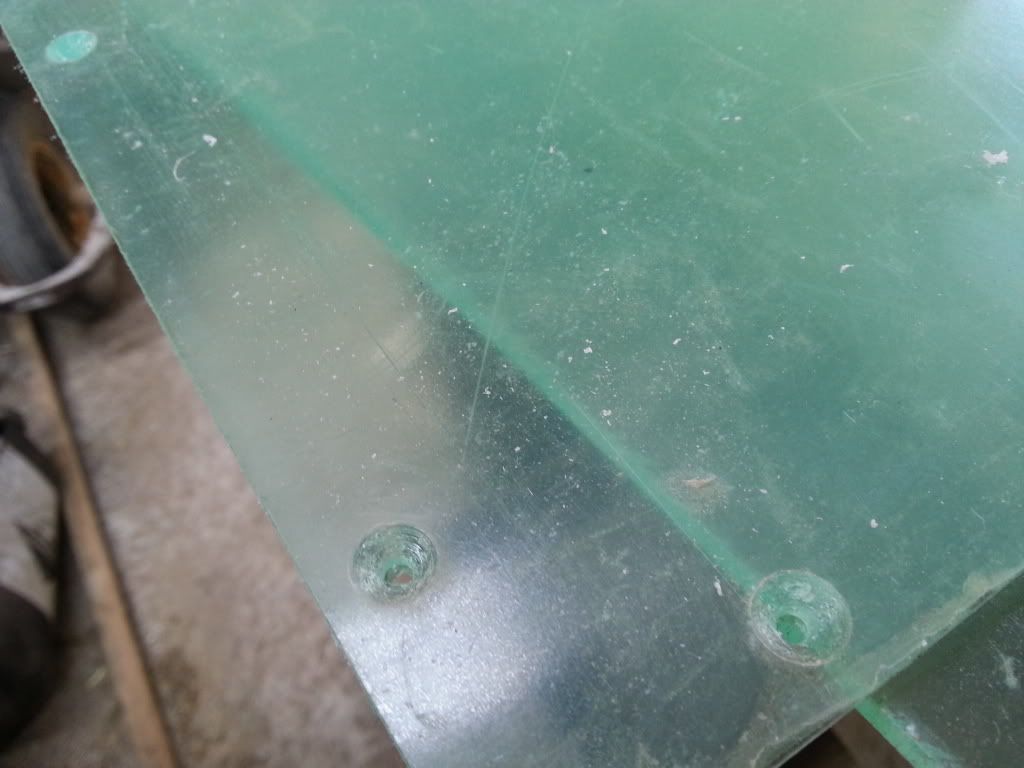
All five sections of Perspex have four holes drilled along each edge, then all the holes are countersunk to leave a smooth finish when assembled (this also avoids any injury's to anyone inside).
Its coming together now!
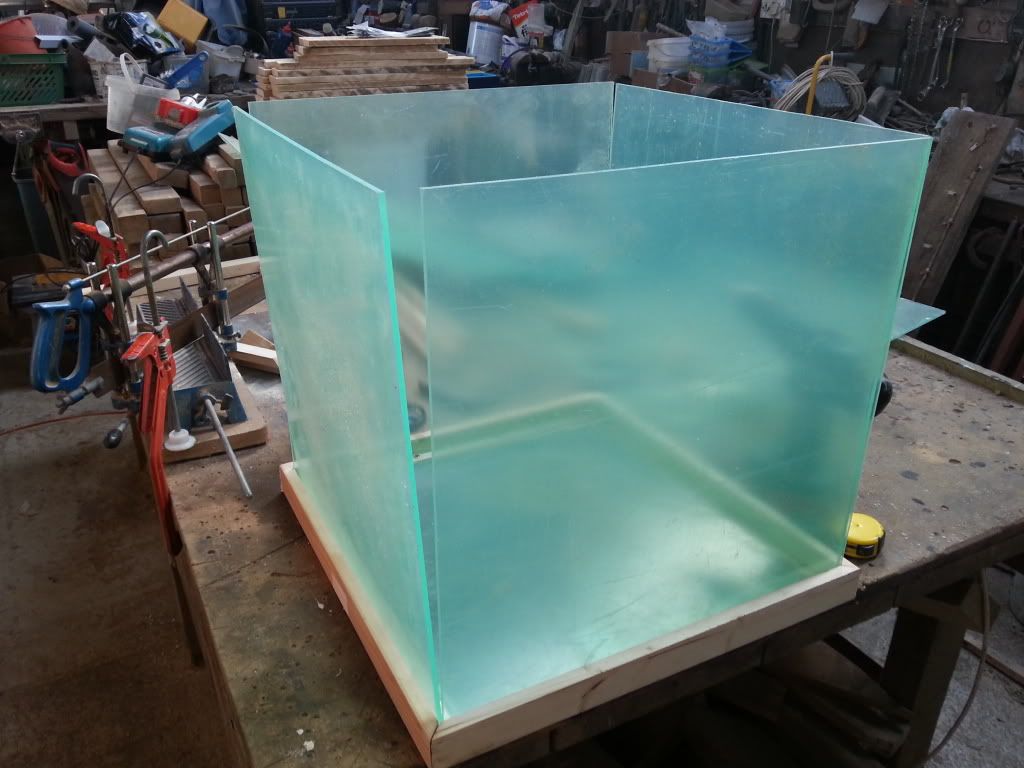
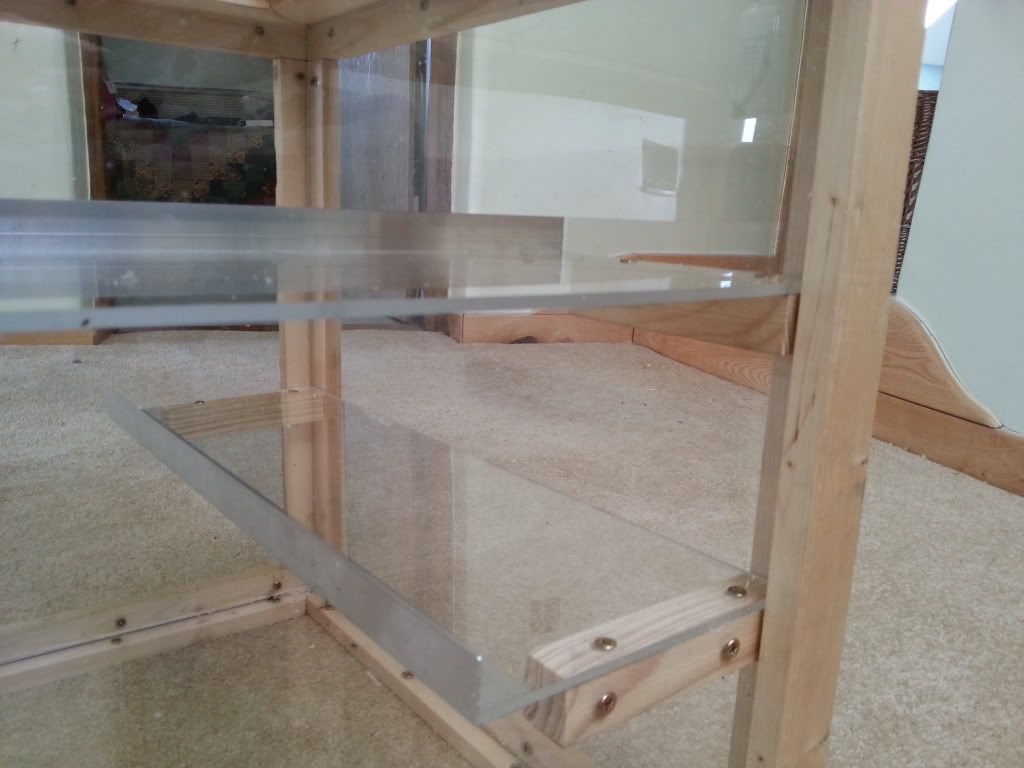
I didn't get any photos of putting the rest of the frame on, or building the shelves. But here is a completed shelf prior to being fixed in place. You can see the Angle Aluminium on the outside edge, this protects the Perspex from little teeth & voids any chance of any one slipping off. The wooden blocks are quite chunky & are sacrificial. They will be checked on a daily basis & replaced if needs be. If we do have trouble with them I will replace with more Aluminium Angle.

This is the Tank as she stands now, photographed from the rear corner as as it shows the shelves most clearly. You can see the plastic film that keeps the Perspex clean (& green!), has been pealed back along all of the edges to allow it to come off easily when its supposed to.
There is a slight change in the design for now. I will be making the lid to fit the tank before making the topper. As I'm pushed for time so much, I'd rather we get Nipper housed sooner than making her wait however much longer to get the whole lot together. Then I'll adapt the topper to take the ready made lid.
Hopefully this time next week, Nipper will be in the tank. As I have to wait for Kate to be home from Uni' before letting the Gerbil loose! Haha


But if we do get any trouble with that, Its not a big job to replace any parts & then to seal it.
------------------------------------------
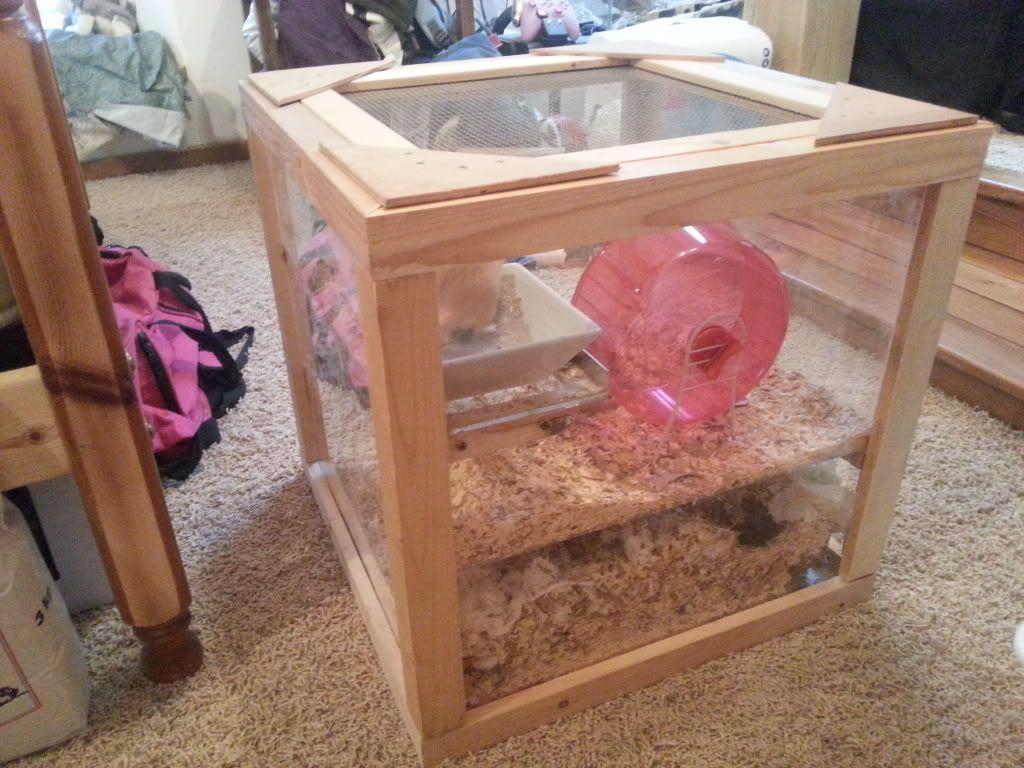
I did get the lid completed on Monday - I was out in the workshop until 9:30 Monday night, took some photos of it out there, came indoors, ate some food, then fell asleep on the sofa! So I didn't update then, combined with how busy we've been this week, this is the first opportunity to let you guys in on the good news!
Anyway, I did complete the lid, I cleaned the tank on Tuesday & we housed Nipper on Wednesday night.
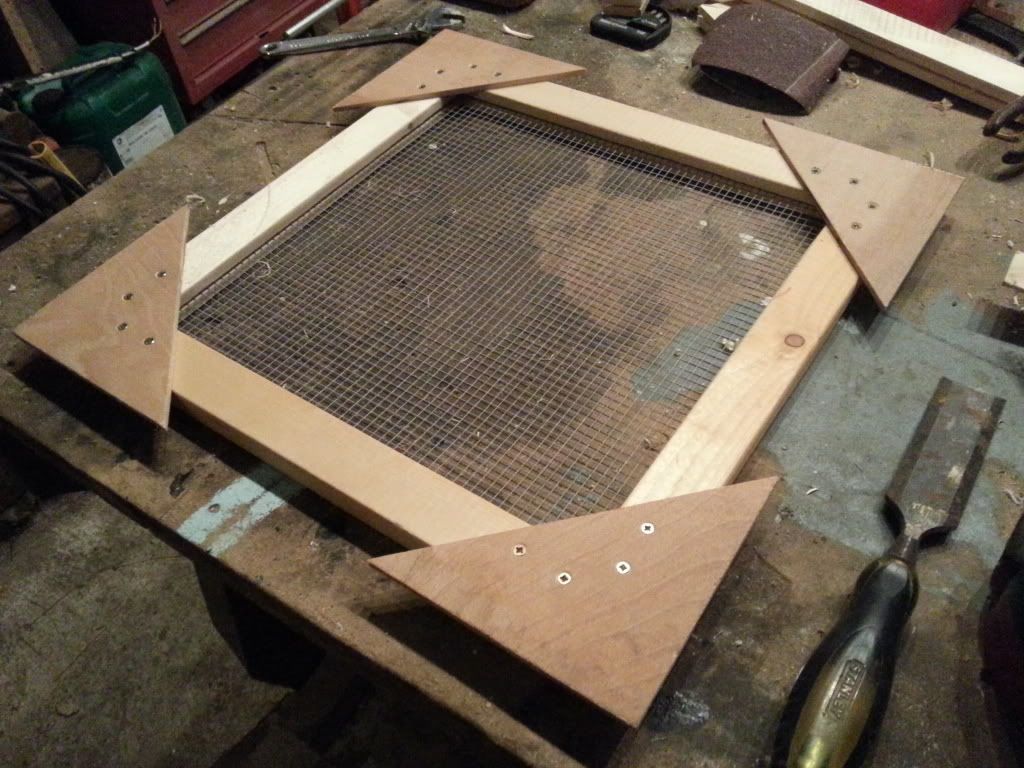
This is the lid after completion, I didn't take any photos during the build because I just wanted to get it done. (I can get more pictures if anyone wants a guide to making a similar lid though)
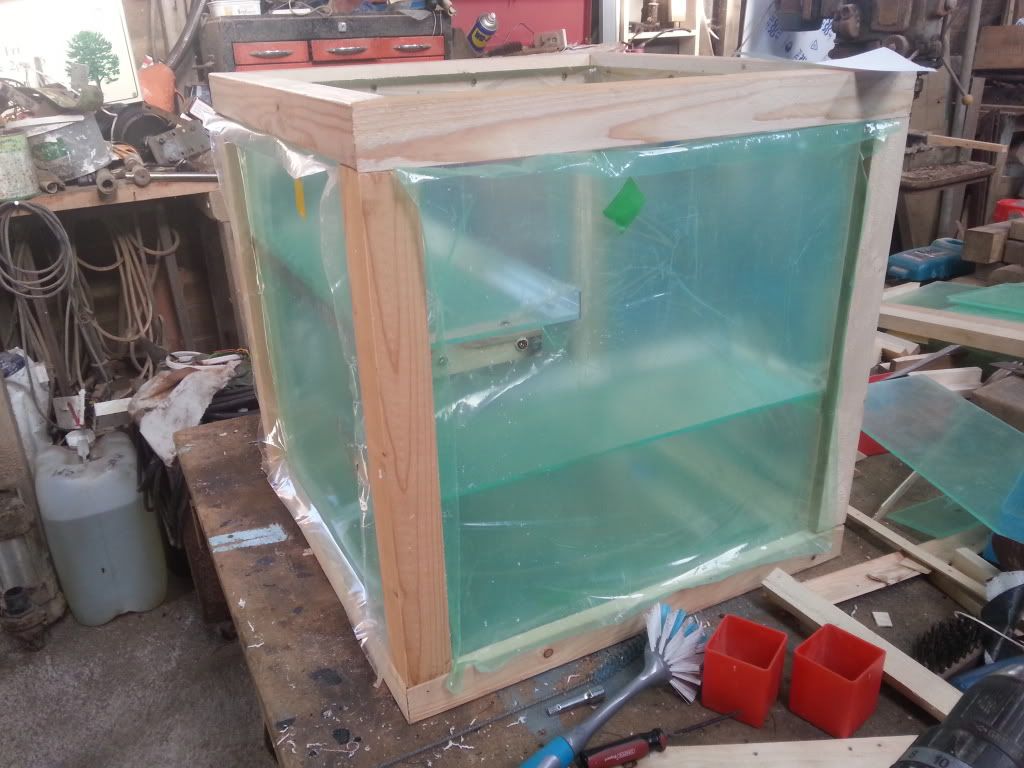
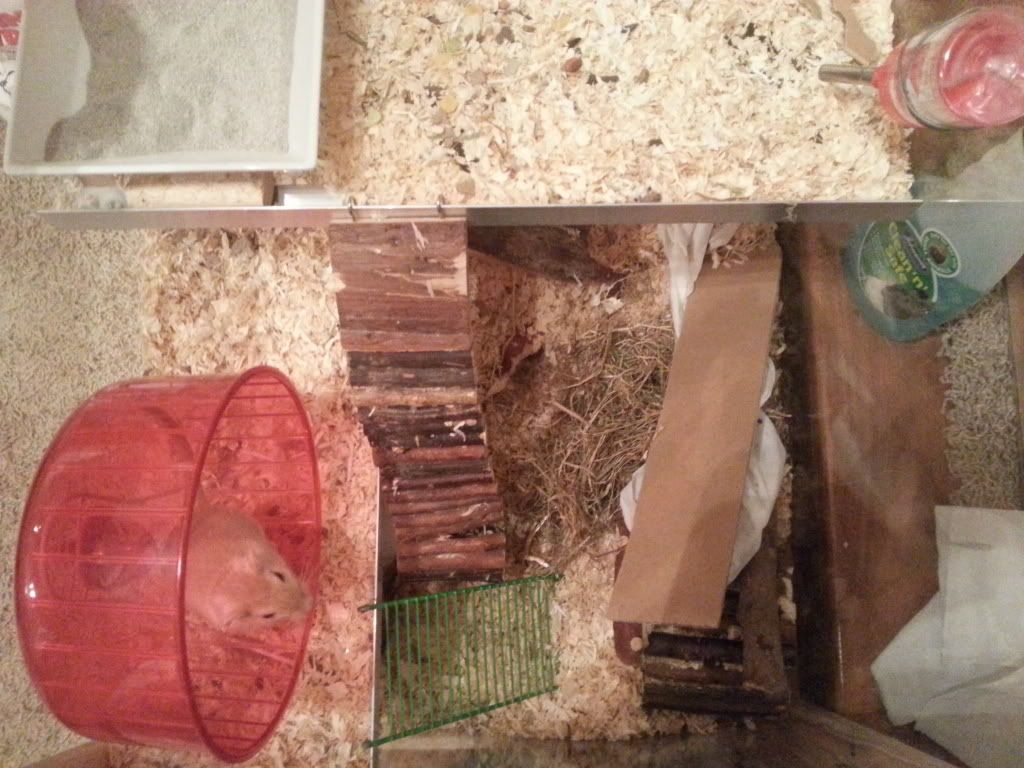
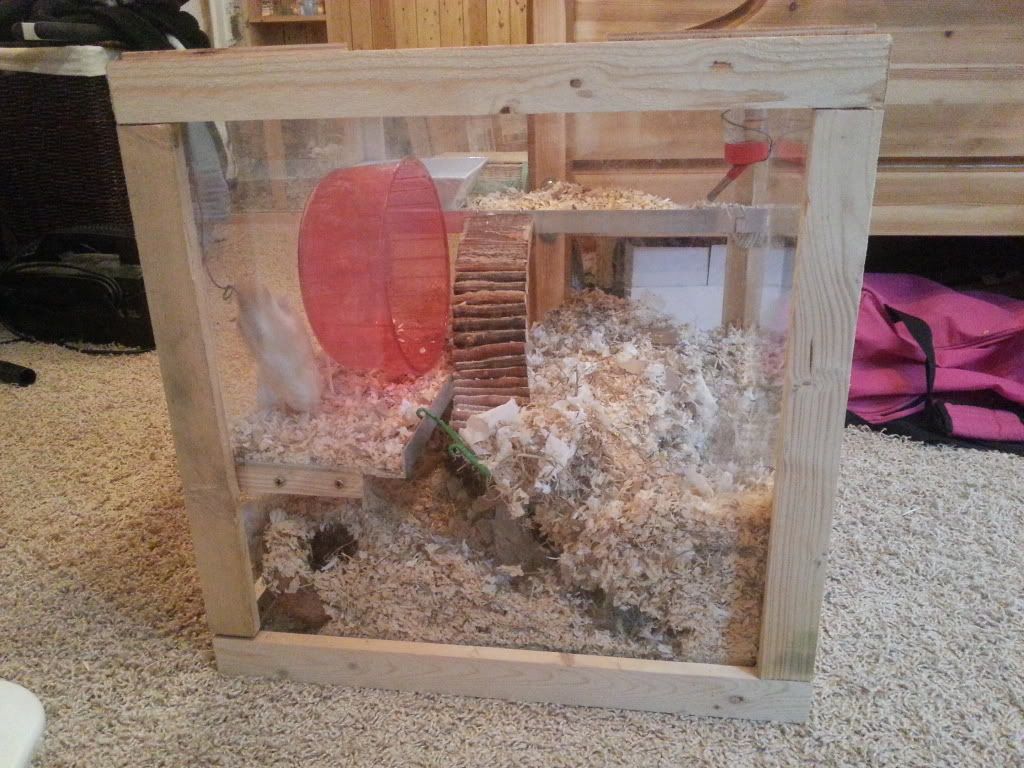
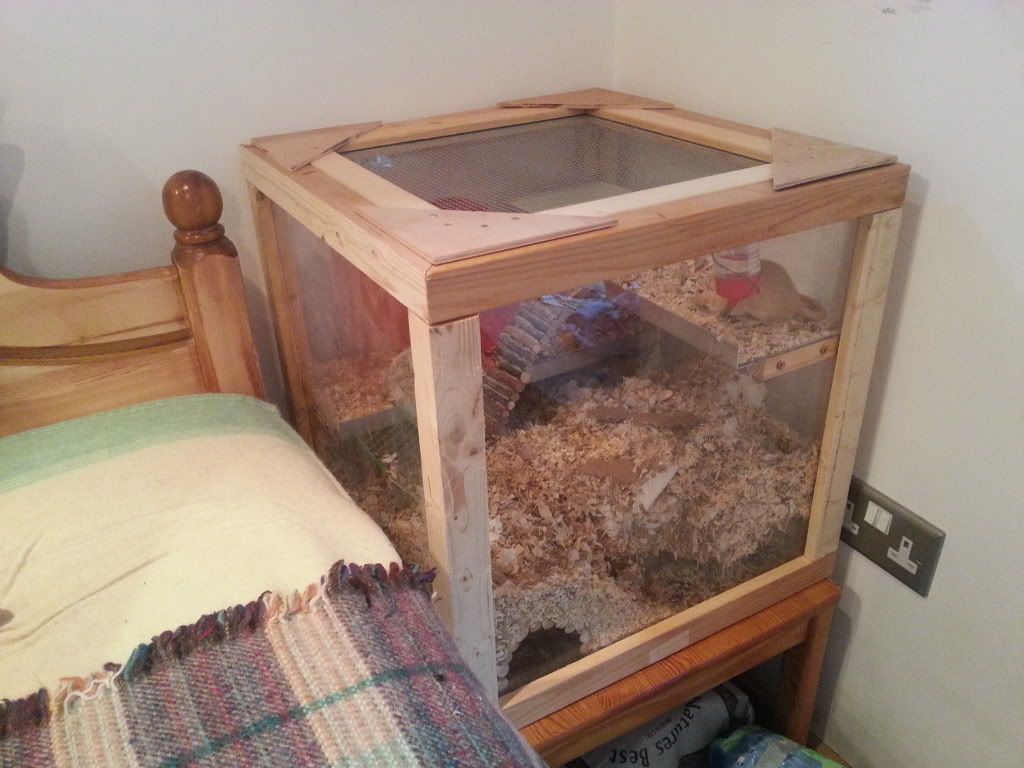
This is the tank (pre-first cleaning).
Close up of the shelves, from the 'back' of the tank.
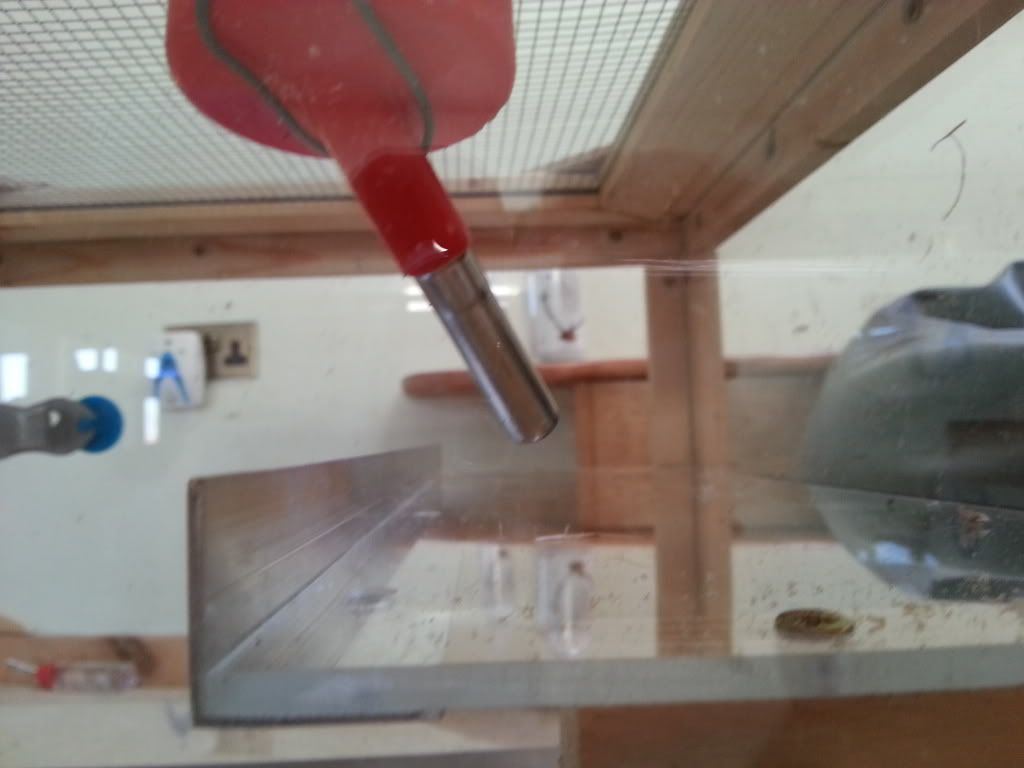
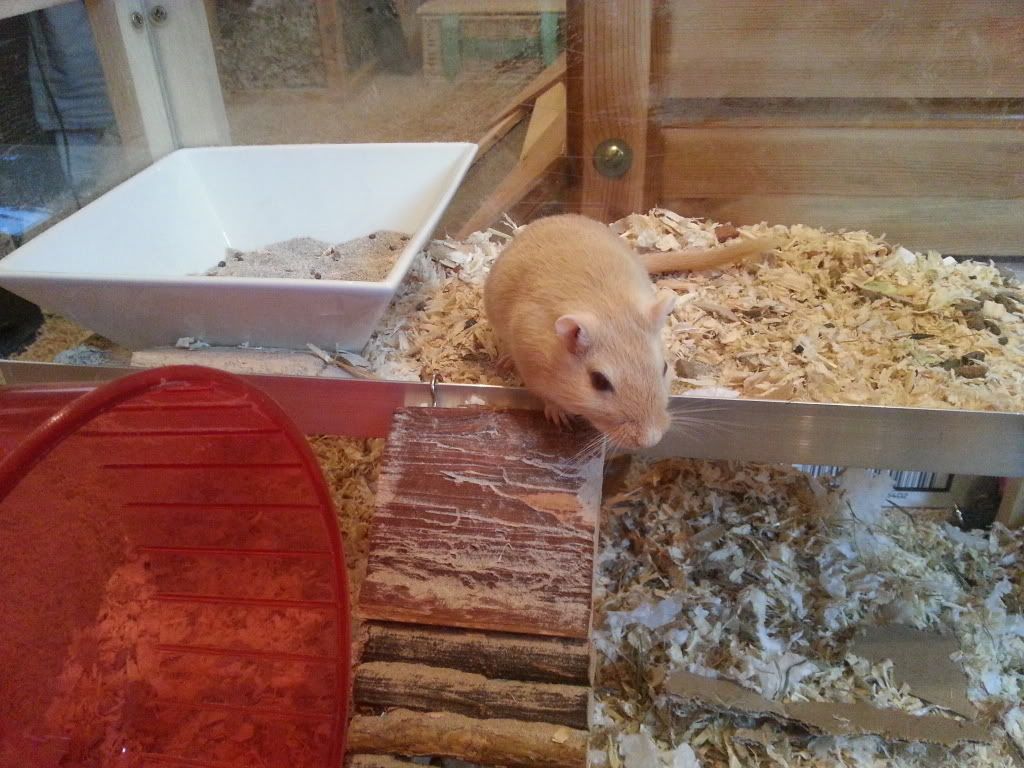
Is this too low for the water bottle? There's only a small amount of bedding on that shelf & we've seen Nipper drink from it, but I'm just worried that its too low for 'long term' drinking?
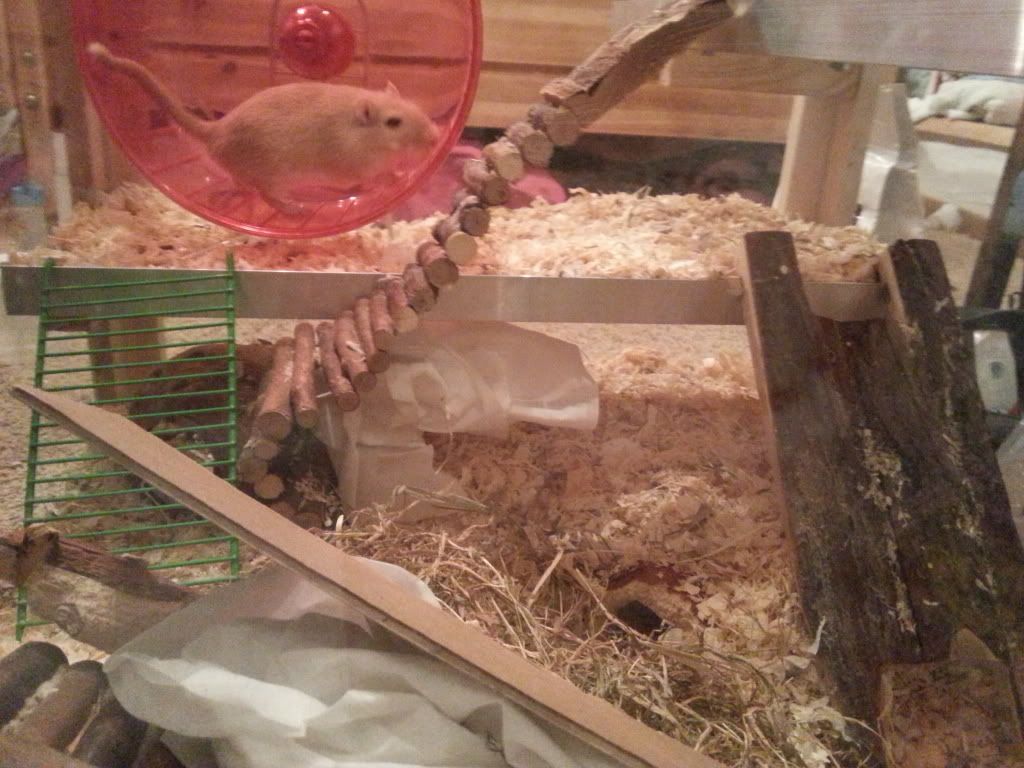
Some photos of it filled & 'Nipper-ed'
 (I will get some better pictures, just realised how grainy they look)
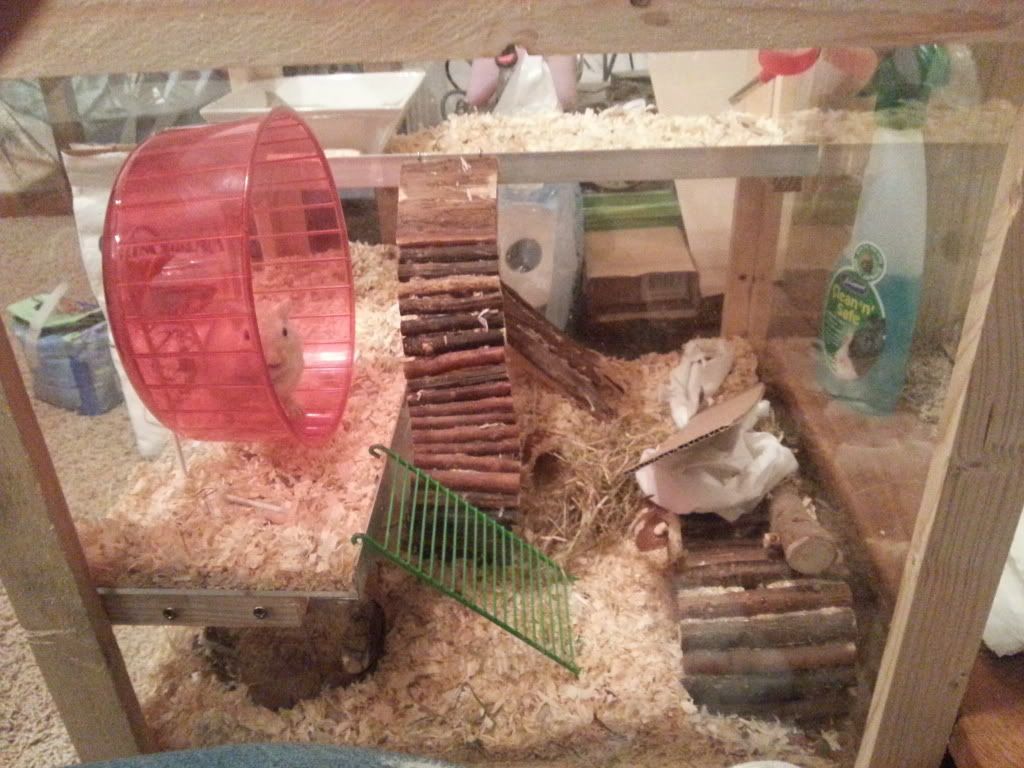
So, whatcha think?
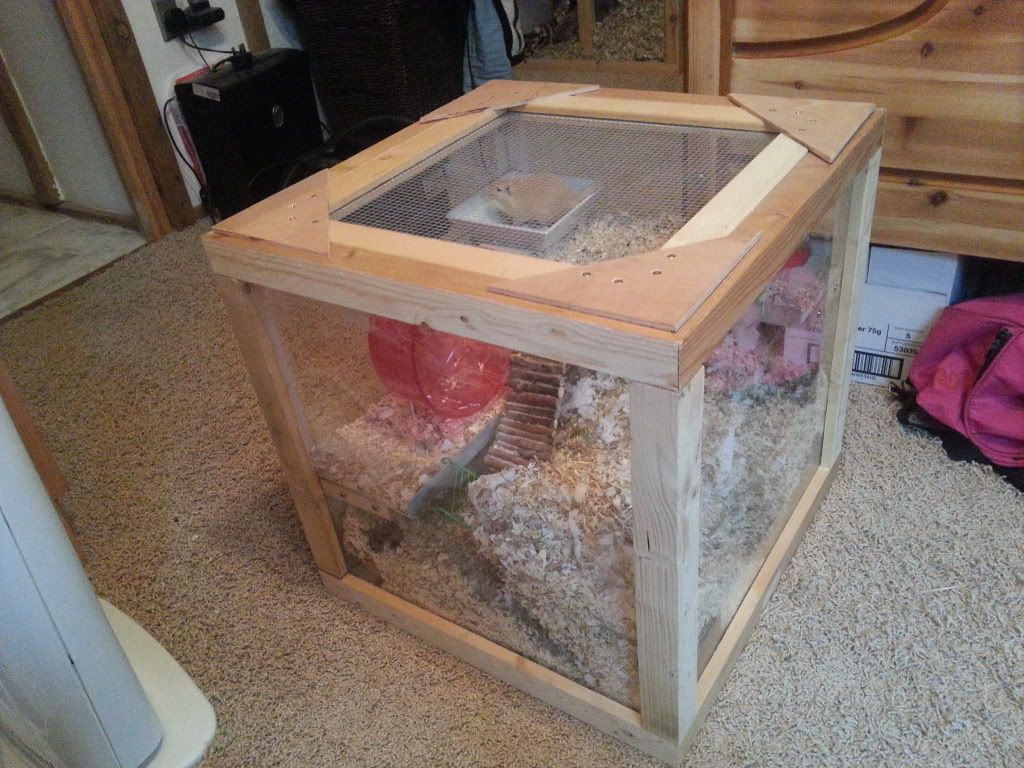
One slight negative note to start, I haven't yet had time to build the topper. Weekends come & go & weekday evenings just seem to do the same, while both are involving me doing things that's not building a Gerbil cage (!)

Positive note though; Nipper loves her new tank & isn't worried in the slightest about not having a topper
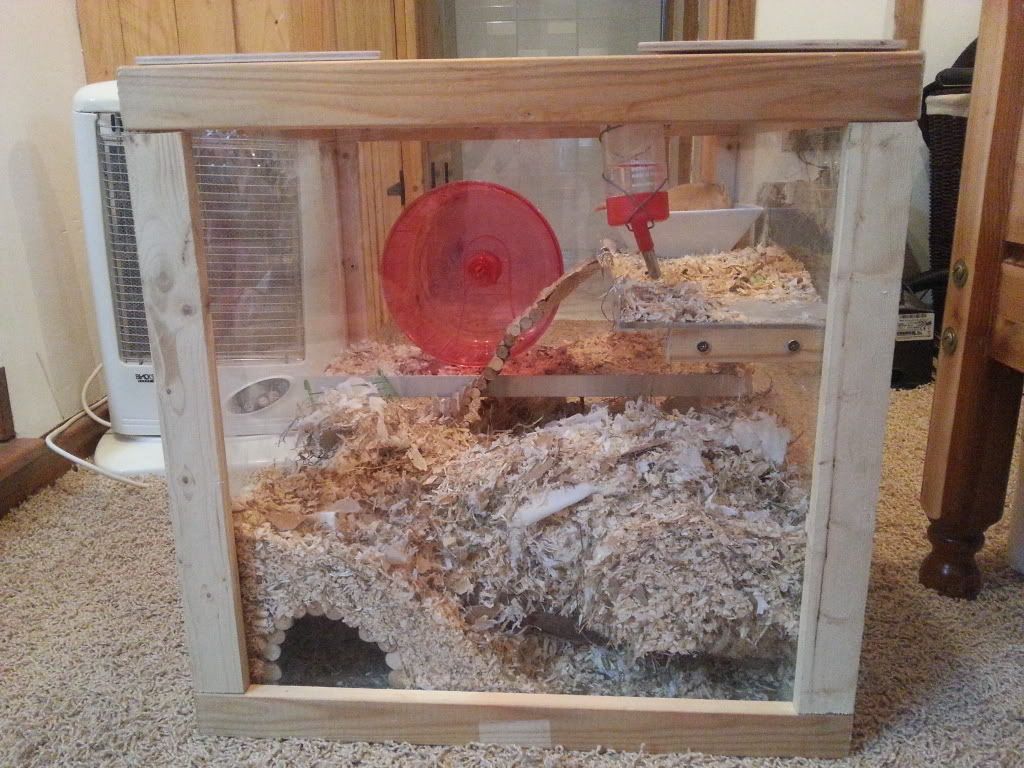
Here are some pictures of how the tank is holding up so far (please excuse the large photos again);
These two are of how the lid is assembled. From the top;
& the underside;
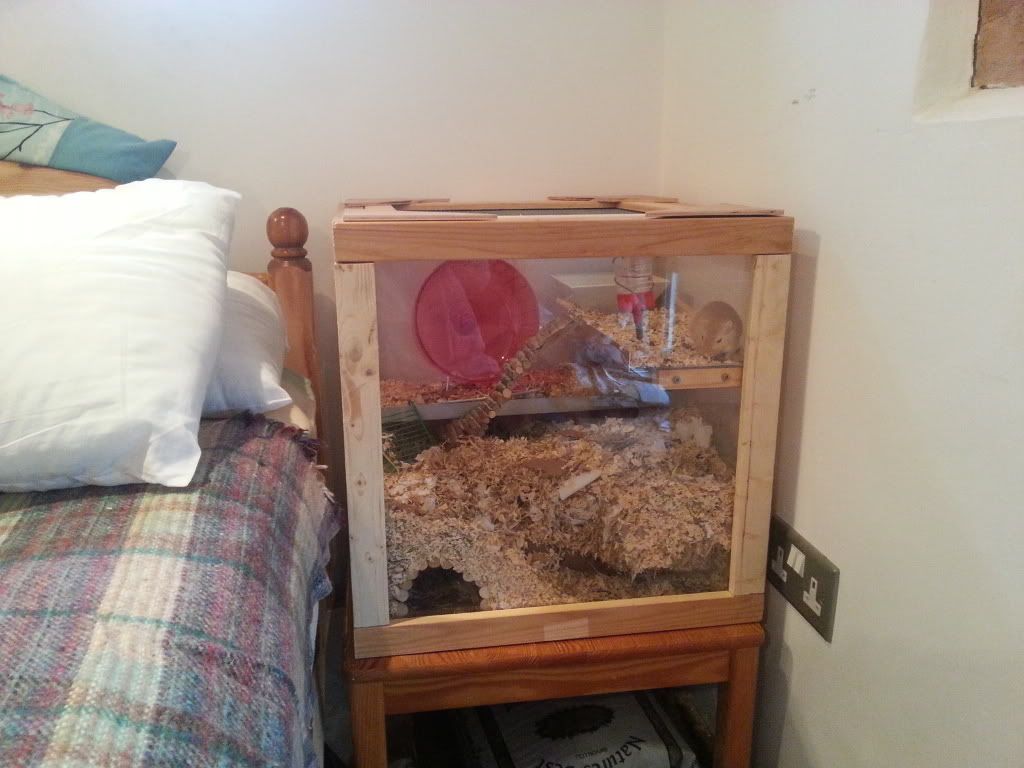
& this is where it normally lives - (ignore the 'naked' bed, the sheets where in the wash at this time!)
Fits the table perfectly!
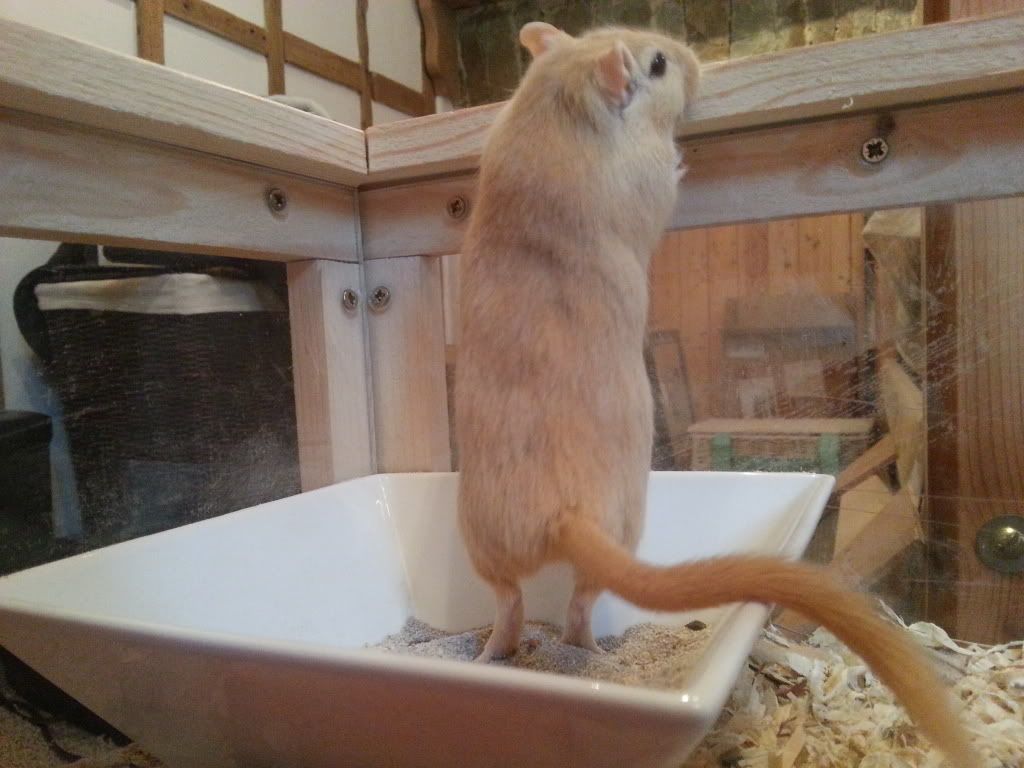
& to finish with some of the lucky girl herself
"Welcome to my pad, up here is my dining area, I've also got my sand bath here. Down there is my exercise centre. Its real cosy & I've got all that I need!"
"Leave me alone! I'm busy!"

"The neighbours are mowing the lawn again, that's the fourth time this week!"
So, thanks for reading through. I'll update once I finally get to make any progress on the topper.
Cheers!
